
Mad Scientist Day 2012: Ten “Sweet” Experiments

August 9, 2012
If Bea had Soap Making on the top of her Summer of Funner 2012 wish-list, the one thing that Tobes wanted to do was to “smash Skittles” [the kids absolutely love Skittles] and “make them into potions.” The kids’ idea of backyard “potion making,” however, isn’t very productive. They tend to take food or flowers or whatever they can find, grind it up, mix it with water, and pour it on the sidewalk chanting “Ex-pelly-ahh-moose!” et cetera.
Looking back upon last summer’s Eggsperiment Day as a highly successful foray into scientific discovery, I decided to look into various ways that we could use Skittles and other candies in a likewise “Scientific Manner.” Drawing heavily from the phenomenal Steve Spangler Science website (I wish I’d seen this last year when I was designing the Eggsperiments!), I transformed a few basic experiment ideas into “magic tricks” that I could perform in order to lure the kids into a series of further sweet spells and queries. The kids are already used to “candy math” (my fool-proof way of getting them to learn to Skip-Count, multiply and divide), so I was sure the day would be a success, no matter if the experiments were failures or successes! And of course it was! You can’t go wrong with candy! We may just have to turn this into a Kids Birthday Party Plan for one of ours next year!!!!
Below, you’ll find a recap of our 10 Sweet Science Experiments with a photo gallery to follow each.
 1) Mama’s Magic Trick: Fattening a Gummy Bear Overnight
Materials: Gummy Bears, Glasses of Water
I didn’t want to tell the kids we were doing “Candy Experiments” until the morning of our experiment day, so I gave the kids a few gummy bears after supper as well as a cup of water. This way, they wouldn’t think anything was funny when they saw them around the house. After they went up to bed, I dropped a gummy bear in a fancier glass and set it on the counter. In the morning, the kids came down to find fat bears in water! We took them out and compared them to dry original bears in terms of size and feel. I asked the kids how they thought this would happen, handing them their Yesterday Books in order to record their hypotheses. Then, I told them how it worked: The gummy bear is made of glucose starch and gelatin. All of these substances absorb water when placed in it. But the starch and gelatin in the bear prevent it from dissolving the way that sugar normally does in water. So it swells up. Then, the kids floated a few more bears of their own to see how fast it worked! It only took an hour or so for some “substantial” results! The kids went on to hypothesize that you could do the same with Gummy Worms etcetera. Perhaps for a kids’ birthday party, we could make “Fat Worms” – put that on the list of “Things to Do!”


 2) Magic Trick: “Snake Charmer” Skittles
Materials: Skittles (or M&Ms), Water, Cups or Bowls
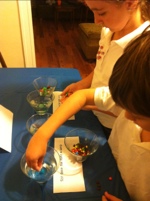
If you drop a skittle face up in water, the colour slowly bleeds out and the sheet of thicker, edible sugar on which the “S” is printed slowly pulls away from the top and floats to the surface. Again, I didn’t tell the kids what would happen for this one. Instead, I told them to drop their skittles in the water, point to the ramekin and ask the bowl “What sound does a snake make? Tell me magic water, What sound does a snake make?” It was pretty hysterical! The kids then practiced this “trick” on each other. Then, we discussed the rationale of why this happens, namely, that while the colourful sugar coating of the candy dissolves almost immediately in water, the “S” is printed in edible ink on an edible papery substance (like the edible rice paper wrappings on some Japanese candies we’ve tried.) which, while it may have some sugar in it, is lighter and buoyant, rising to the top before it, too, dissolves, especially if you touch it!


 3) Experiment: Can You Make the Mini-M&Ms Say “Mmmmm”?
Materials: Mini M&M’s, Water, Cups or Bowls
I had read that you could do the same as above with M&Ms, and such is the case. However, we remembered that sometimes experiments with larger or smaller versions of an original object will not produce the same results. So, the kids tried to see if they could make teeny tiny ms rise from the water. Hypothesis? The tiny “M”‘s will rise. Result: The tiny “M”‘s did rise! 


 4) Favourite Experiment: “Will it Float? The Candy Edition”
Materials: Various Candy Bars, Water, Sugar, A Large Clear Vessel, Spoon/Stirrer Stick, Paper & Pencil to Record Results
For one of last year’s Eggsperiments, we tried floating fresh and hard boiled eggs in water and then in salt-water solution, discussing the notion of a denser or “heavier” solution would make an object that sank in water float. This year, we tried to float various candies and chocolate bars in a vessel of water. (I cut slices of some of the larger bars and broke of squares of those that I could and put the rest of the sugar-stuff away – out of sight, out of mind!). Then, we tried to float the same treats in a sugar-water solutions (added gradually in x3 teaspoon increments) and tabulated our results in our Yesterday Books. The candies that floated in water were: Marshmallows, Kit Kats, and Aeros. The candies that were no-floats were: Dairy Milk (chocolate bar), Snickers, Twix, and Mars. Our Hypothesis: The candies with air trapped inside of them miraculously floated in water. The candies without air trapped inside sank in water!
Then on to buoyancy in a sugar solution… Of the candies on the no-float list, none floated in a martini glass of water mixed with 3 teaspoons of sugar. Of the no-float list, Twix and Mars slices floated in a martini glass mixes with 9 teaspoons total sugar while Snickers and Dairy Milk did not float. In 18 teaspoons of sugar plus the water in the martini glass, neither the Snickers nor the Dairy Milk floated. In 24 teaspoons of sugar plus the water in the glass, the Snickers floated. The solid Dairy Milk bar still did not float! The kids hypothesized, however, that the bar would float if we made a thick enough mixture, but they did not want to use any more of our “baking sugar,” as they called it, to test it out!


 5) Experiment: Smashed Skittle Liquid Rainbow – Failed this Time but Fun – Requires Further Testing!
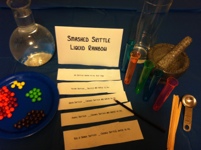
Materials: Several Skittles, Water, Cups or Dollar Store “Test Tube” shot glasses, Mortar and Pestle, Funnel, One Tall Narrow Empty Vessel, Spoons or Droppers
Here, Tobes FINALLY got to smash his Skittles! Pure heaven! First, we separated the skittles out into groups by colour. Then, we took a different amount of skittles per four colours: 5 Yellow, 10 Green, 20 Purple and 40 Orange & Red. We smashed them in a mortar and pestle with 2 tbs water, so that the sugar coating dissolved into our water and the gooey bodies were separated. Then, we poured the coloured sugar water part through a funnel into our “test tubes,” and topped the tubes up with water, stirring until combined. We made sure that there was an equal amount of substance in each cup, knowing that each cup had a different amount of sugar or a different density. This took a while, and it was totally fun. Then, we poured the most sugary substance into the bottom of our clear vessel, following from greatest to least amount of sugar, attempting create a density rainbow of skittles. Unfortunately, we did not have a different enough density between the test tubes for this experiment to work! We ended up with a glass full of purply orange goo. Still, it was fun! The kids hypothesized that if we used a special eyedropper to disseminate our liquids, and if we had a greater range in amount of skittles per colour/equal-sized container, the experiment would probably have worked! The most important part of this experiment was the SMASHING!


 6) Centerpiece Experiment: Magic Sugar Rainbow
Water, Sugar, 4 cups, Food Colouring, One Clear, Tall, Narrow Empty Vessel, Stir sticks or Spoons, Turkey Baster
The basis for this experiment is the same as the previous one – by dissolving different amounts of sugar in water and colouring them, you can build a “rainbow” in a glass by layering the liquids from the most to the least dense. This time, I let the kids figure out how to do it all on their own, leaving them with measuring cups, droppers of food colouring, sugar, water,and stirrer sticks. We had four equal sized martini glasses. The kids put 1 tsp sugar into a glass and filled it with 6 drops yellow food colour and water to just below the brim. In the next, 1/4 cup sugar, 6 drops green and water to the brim. In the next, 1/2 cup sugar, 6 drops blue, and water to the brim. In the last, 1 cup sugar, 6 drops red and just a bit of water to the brim. Then, we stirred and stirred until each solution was dissolved. Finally, we used a turkey baster to add the liquids, from thickest to lightest, to a tall narrow glass vase. This time, we had success! The red stayed firmly at the bottom. While the blues and greens muddled a bit, there was definitely gradation of colour as it rose to the top of the vase. The yellow, of course, became green, but there was still a gradation of colour from top to bottom! Fun, fun, fun!!!!


 7) Festive Magic: Micro-Baked Volcano Cups with Koolaid Lava
Volcano: Salt-Dough (a 2:1:1 solution of flour:salt:water + Food Colour), micro-safe cups, plate or tray
Lava: Vinegar, Red Koolaid, Baking Soda, cup and spoon
Two summers ago, before I stared keeping track of our fun online, the kids and I made volcanoes out of clay and then tried the two basic tricks of exploding vinegar and baking soda, and diet coke and mentos inside of them. This year, we revisited ye old Volcano experiment by baking Salt Dough volcanoes in the oven and by “Sweetening” our pot. This year we made salt dough with a little colour, mixing 2 cups flour, 1 cup sugar, and 1 cup water with some food colouring. Then, I had the kids mold free-form volcanoes around two somewhat-microwaveable plastic cups and we micro baked them on plates, first for a minute, then for 30 second bursts until mostly dry. (See our Salt-Dough Ornaments post for oven-baking info, or just use a cup or tin can as your volcano!). I had the kids place their volcanos on trays and fill their centers with baking soda. Then, I had them mix their vinegar and koolaid in a separate cup. We poured these into our volcanos and stood back to watch them erupt!
Finally, we refreshed our memories about how and why this works: When Baking soda and vinegar are combined, the Acetic Acid in the vinegar reacts with Sodium Bicarbonate in something called a “Double Replacement Reaction .” The reaction between the acid and the bicarb almost immediately form something called carbonic acid. However, the carbonic acid is so unstable that it just as quickly breaks apart into carbon dioxide and water. The bubbles in the “lava” are actually the carbon dioxide esscaping. In the end, what “escapes” the volcano are Water, Sodium Acetate, and Carbon Dioxide.


 8) Unphotographable Experiment: Sparks in the Dark, or, Lifesaver Lightning
Wintergreen Lifesavers, A Dark Room, A Good Strong Mouthful of Teeth or a Mortar and Pestle
The kids went into a dark closet and bit into their lifesavers -and they saw sparks!!! Then, they took the mortar and pestle to the lifesavers and found more of the same. Apparently, all hard candies emit some light when you bite them. This effect is called triboluminscence. But Wintergreen lifesavers are flavoured with methyl salicylate, or oil of wintergreen, which is flourescent, absorbing light that is of a shorter wavelength and emitting light of a longer wavelength than just plain old candy. Who knew? Of course the kids tried to “bite” down on other candies in order to prove the lightning power of the wintergreen over all others….Who wouldn’t test a bunch?
 9) More Festive Magic: Lifesaver Soda Explosion
Wintergreen Lifesavers, possibly a Mortar and Pestle, Meat Cleaver or Hammer & Board, Bottles of Soda, Paper Funnel
This time, we attempted to re-do ye olde Mentos in the Diet Coke Explosion experiment by swapping Mentos for our Wintergreen lifesavers and diet coke. Our lifesavers came in a bulk pack and so were larger than the ordinary kind, so the kids used smashed bits from the previous experiment. They made a paper funnel and quickly dropped several wintergreen lifesavers into a just opened bottles soda. Then, they stood back and watched the magic happen. The lifesavers geysere were larger than the ones we made with the mentos two years ago! Spectacular!
Why does this happen? Well, carbon dioxide is always escaping soda bottles once they are opened. However, because of their ingredients and rough surfaces, items like Mentos, and, to a slightly lesser degree, this year’s Wintergreen Lifesavers, cause that build up and escape of gas to occur much more quickly.


 10) Ye Olde Exploding the Ivory Soap in the Microwave trick…with a Candy Mold Finish for the Soaps!
Materials: Ivory Soap, Microwave-safe Plate, Waxed or Parchment Paper or Paper Towel, Microwave, Koolaid or Food Colour, Candy Molds or Cookie Cutters
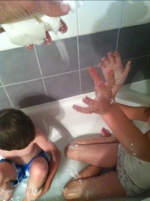
Place an unwrapped bar of ivory soap on a plate or piece of thick paper towel in the microwave. Microwave for 45 seconds – 2 minutes until the soap “foams” turning into a cloud! Watch it carefully! It gets quite large. You don’t want to overcook! Apparently, two scientific transformations occur here. First, you are heating and, hence, softening the soap. Second, you are heating the air and water trapped inside of the soap. Thus, the water vaporizes and the air to expands into a foam. But what to do with the foam? Make candy mold soaps again, or snow, or lather up and get rid of all the evidence of candy mess! Careful! After a while, if you haven’t already tested the soap out in the tub to see if it still lathers (and it does!), it will crash open and break into thousands of tiny shards.
Here are things we did with it (with many thanks to the best bites blog for the inspiration which led us to our “candy mold” tweak). Soap 1 (we had a three pack): Place soap foam into a big bowl, add warm water enough to make the soap back into a pliable clay type substance. Divide the mush and colour with koolaid or food colouring. Form into shapes or press into CANDY MOLDS or cookie cutters. Of course we used Candy Molds, because it was the perfect day for it! Our soaps didn’t turn out that great, to be quite honest, but the kids enjoyed looking at them through the molds. Soap 2: Bring it into the tub, smash it, or make it into lather. Soap 3: Let mama hold it over your head and crumble it into snow over top of you (also in the tub).


________________________
Quick Links for Mobile Users
Summer of Funner : The Lunchbox Season : In Defense of Burning
Crazy Fruit Day
August 16, 2011
 Sure, we’ve painted with pineapple skins…We even attempted to grow one from a crown on our windowsill…Still, this year’s “Crazy Fruit Day” took the old “Pineapple Day” up a notch. Today, we played a Name That Fruit Game, we created Still Life pieces with ink and watercolours, and we operated a Blind Fruit Tasting. There were also some Special Surprises towards the end of the day…
To Market, To Market…By Herself

Mangosteen
Originally, I had planned to take the kids on an early Tuesday morning excursion down to Chinatown to pick up the fruits for today’s fun and games.

- Lychee

But, when I heard about some temporary changes to the streetcar route, I nixed that idea and headed over to Chinatown by myself on Monday to pick up our supply of “Crazy Fruit.”

- Rambutan

First, on the recommendation of friends, I picked up several spiny looking Rambutans and a sextet of plum-coloured Mangosteens. I followed these up with a netted bag of Lychees and a few stalks of Longans.

Then, I asked a vendor about the Sweet Sops and Sapodillas at the front of his shop, and I picked up a pair of each of those.

Dragonfruit
The large, lone Dragon Fruit was an easy choice, because the kids were familiar with it, and they were hoping that it would be on my list.

Passionfruit
I also spotted a trio of orange Passionfruits held together by an elastic band and added those to my increasingly heavy bag.

Sweet Sop
Trekking west through Kensington Market, I searched for the ultimate fruit (at least in my book): the Prickly Pear. I had seen them a few weeks ago at a local grocery store, and I was hoping that they might still be available somewhere.

Longan
I had a secret wish, you see, to make Prickly Pear Jelly as a special Cook’s Treat towards the end of the day.

Kiwano (Horned Melon)
I had Prickly Pear jelly once when I was a girl, on a family vacation at a dude ranch in Arizona. I’ve always wanted to try it once more and share it with the family. But, I couldn’t find prickly pears either in Chinatown or in the Market, so I settled for something new, a pair of orange, horned, Kiwano melons!
One last bit of preparation…The next morning, before the kids were up, I took the fruits out of their hiding spot in the cupboard and organized them onto separate plates and bowls on the dining room table. Then, I went and printed two sets of namecards for each of the fruits on yellow and green paper…
Name That Crazy Fruit
 We haven’t played many games on our food days this year…so it was about time we got down to some funny business. I told the kids that it was time to play, “Name That Crazy Fruit,” and I handed each of them a set of nine cards with the names of a Crazy Fruit printed on each one. I asked the kids to place one card beside the plate or bowl filled with the fruit they thought corresponded to the name. I resisted singing the “Chiquita Banana” Song and dancing around like Carmen Miranda with a bunch of Longans on my head while the kids walked around the table trying to place name tags beneath the correct bowls and plates!
 Round one, of course, was the hardest. Bea and Tobes hardly ever concurred when it came to which name suited which fruit. Still, when they did concur, they always had their answers right! They both managed to place the correct nametags under the more familiar Dragonfruit, and the brand new Kiwano (Horned Melon). Bea also labeled the Passion Fruit correctly.
 For Round Two, I handed back all of the cards which they had misplaced and asked the kids to try again. Bea was quite successful in this round, correctly labeling four more of the nine fruits, for a total of six. Except for matching up his Passion Fruit card with Bea’s good guess from round one, Tobes struck out. I think this would have resulted in less disappointment on his part had I not made the mistake of keeping score in a notebook. Still, all wounds were soothed over as Bea kindly took it upon herself to explain to Tobes that she really had “lucked” into it… The kids’ discussion of “luck,” furthermore, resulted in their invention of a “fruit adoption” program which I will explain, below.
 Round Three was over in a flash, as Tobes follwed Bea’s correct examples from round two. And, at last, the kids did the final switch-up between the “hairy-scary” Rambutans and the “absolutely purpular” Mangosteens, as they called them.
Still Life with Crazy Fruit
 A while later, we returned to the Crazy Fruit table in order to do an art project. I quickly familiarized the kids with the concept of Still Life drawing and painting. Then, I had them arrange the crazy fruits on a large platter. I was surprised that they tended to keep the types of fruit together on the plate rather than scattering them around. I really thought the whole display was going to be much less composed than it looked!
 After they had their “model” settled, I drew out the plan for how they would create their Still Life pieces. First, on a piece of thick watercolour paper , they would sketch an outline of their Still Life in permament markers.

Then, they would use watercolours to fill in the “colouring page” they had created with their markers. All of our art supplies, by the way, had come from the local dollar store – so, aside from the initial outlay for the fruit, the whole project was super-thrifty.
 Bea’s still life took up the bottom half of her page. You can pick out particular fruits quite easily from the drawing. Her ability to add details has really strengthened! She also chose to do a close up of a Lychee on the upper right hand corner of her page – noting that she drew it by its “actual size,” which I thought was quite lovely.
 Tobes’ piece looked almost like a pile of fruit covered over by a glass bowl, which was charming in its own right. The single Longan hanging from the roof of this so-called bowl figured as a pendant lamp lighting up an array of animated people-fruit. And, the faces on his Sapodinas reminded me of some drawings of the Moai statues I had them do years ago….
 The kids wanted to do a “second round” of individual fruits. Interestingly, they both chose the dragon fruit for this second sketch. Both brother and sister veered, a bit, from the more realistic sketching of their first attempts, creating compound or fantasy fruits. Bea’s Dragon Fruit, for example, looked like a cross between the Dragon and the Mangosteen.
Before he applied his colours, Tobes’ version of the Dragon Fruit looked as much like the Kiwano (Horned Melon) or the actual fruit platter, as it did like the original, Dragon Fruit
And Then The Kids Improvised: Crazy Fruit Adoptions
 As we were setting up our Still Life display, the kids decided, between themselves, they were each going to “adopt” one of the fruits, make it a home, and keep it “safe from being eaten.” Bea took a lychee from the pile and named it “Lucky Lychee,” while Tobes took a longan and named him, “Lucky Longan.” The discussion of “luck” and probability associated with the naming game had stuck with them, I guess.
 After we were done with our art project, the kids went about personalizing their adoptees. They both drew faces on their fruits with the permanent markers we had used earlier. And, they both set about finding places in the house for the fruits to “live.” I nixed the bedrooms, fearing the inevitable decay and decline of the fruits in some dark corner or closet. So, Tobes hid his fruit for a while beneath a living room pillow, while Bea set up an old jewelry box as a “Lychee Lounge.” She invited Tobes to put his longan in with her lychee. Now, the two no-longer-orphaned fruits are couched in luxury on the mantlepiece!
A Blind Tasting
 Once we were done staring at our fruit display and hiding the lucky pair, we moved on to the afternoon sampling! Tobes decided that he didn’t really want to do more than smell everything, but Bea was eager to try anything and everything. So, I gave Tobes the chore of helping me to slice each fruit open and to place a small slice or spoonful of the treat on our platter. We arranged the fruits in a “tasting wheel,” as Tobes put it, taking time, of course, to stop and make spooky-eyes with the round, white lychee fruits and their stones!
 Then, the kids got the bright idea that Bea should wear my sleep mask and conduct her Crazy Fruit Tasting “Blind,” attempting to guess, once again, which fruit went with which name. This time, as Toby predicted, she was not as “lucky” as she had been before. Bea had seen the fruits going down on the plate and so she knew how difficult it would be to confuse the Lychee orbs, for instance, with the almost-identical fruits of the Rambutan and the Longan. And, she did mix them up!
 All guessing aside, I was impressed by Bea’s determination to try everything! The only fruits she decided not to keep in her mouth were the the Sweet Sop and Sapodina – which weren’t necessarily that toothsome, to be quite honest (I tried everything along with her, out of fairness). Despite some problem spots, she championed through. In the end, her favourites were the Mangosteen, Kiwano, Lychee, and Rambutan. The Longans, however, were on her “I’ll Take a Pass” list, along with the aforementioned “S” fruits and the Passionfruit. She remains iffy about the Dragon Fruit. It was not as sweet as she remembered it when she tried it a few years ago. Perhaps we’ll have another go with that hot-pink number sometime soon.
Cook’s Treat: Lemon Balm & Verbena Jelly
 While the kids were off playing independently, I decided that I would make myself another Cook’s Treat. Of course, I had wanted to make that Prickly Pear Jelly. Since this was not an option, I researched making jams, jellies and cordials from the nine fruits on our Crazy Fruit list. Unfortunately, the subtle flavours of Lychee and Co. were either just too subtle or too unpredictable for jelly making, or we just didn’t have enough of a certain fruit on hand in order to make a more robust offering. So, I decided to put off incorporating one of our crazy fruits into my mix, and, instead, went for something from the garden – something I’d never been “crazy” enough, or let’s just say, smart or savvy enough to try making before: Herb Jelly!
 Now, I’m a lemon fan…So, I figured that a Lemon-type Jelly would work well, say, as a glaze over the top of a future Crazy Fruit Tart, perhaps, or a Clafouti…so I headed out to cut some Lemon Balm and Lemon Verbena…But then, I had an idea. Bea has a very bad habit of making “potions” and “wands” in the backyard by picking our most glorious blooms or by decapitating the tender, new growth on our magnolia trees… So, I figured, why not give her the opportunity to harvest what we wanted? It wasn’t a hard sell. She swiftly set aside her markers to head outside with my kitchen shears and a glass bowl, filling it high.
Then, I got to work on my jelly. This was my first attempt at jelly, actually. I’ve only ever made jams…But, armed with my new best friend, Liquid Pectin, I was ready for the challenge. I found a lovely recipe for Lemon Balm Jelly that the writer of The Creamer Chronicles had tweaked from her own Rose Petal Jelly recipe. Since I meant to use up the last of my fancy half-pint jam jars anyway, I set a large pot of water to boil on the stove and dropped the glass jars into it before I tackled the recipe.
 I had plenty of herbs on hand (the little girl harvests well!), so I boldly doubled the amount of herbs called for in the original recipe, placing 1 cup of chopped lemon balm leaves and 1 cup of chopped lemon verbena leaves in a stock pot. (I’m sure that a single cup of any herb or edible flower would be sufficient for the job here). I poured about 3 cups of boiling water over this mixture, jabbed at the leaves a bit with a wooden spoon, and let them sit in the pot, covered, for about 15 minutes. While this herb “tea” was brewing, I juiced a large lemon over a strainer until I filled the bowl beneath it to 1/2 cup. When the brew was done, I strained the tea into my lemon juice until I had 3 cups of liquid.
Next, I placed my liquid into a saucepan along with 4 1/2 cups of sugar, bringing the mixture up to a hard boil. Once the jelly was boiling, I added 4 drops of yellow food coloring and 1 foil sleeve of liquid pectin. The hot jelly did not take long to return to a boil. In fact, it bubbled over, and I had to take it off of the heat. What a sweet and sticky mess!
 Finally, I got my jelly to boil hard for about 2 minutes. Then, I filled 5 and 1/16 half-pint jars with the sunny hot jelly! Leaving 1/4 inch headspace under the lids of the five full jars, I processed them at a rolling boil for 10 minutes.
After a while, Bea had a taste of the jelly in the “Cook’s Treat” jar, and gave it a thumb’s up!
And Then They Improvised Again!
 During their independent play time, while I was making jelly, the kids decided to do some drawing and pasting in old notebooks that they had brought home from their grandparents’ the day before. I had no idea this was going on, because I was in the kitchen, canning, and the kids were working quietly…But, what a lovely surprise to be introduced to their own Crazy Fruit Day journals! First, Tobes presented me with a sweet image of his Lucky Longan, which he had drawn on a separate page and then taped into his notebook.
 Then, Bea came back to me with two sets of scrap-book style entries that just blew me away! On the first set of pages, she did a recap of her fruit orientation exercises and a sweet introduction to Lucky Lychee and Lucky Longan.
 On the first page of her second spread, Bea spent time detailing the “first year” of Lucky Lychee and Longan’s lives. And, on the facing page, she drew her self-portrait with Lychee!
I was absolutely thrilled by their secret record-keeping!
What a way to end Crazy Fruit Day!!!
__________________________
 INGREDIENTS
Lemon Balm & Verbena Jelly
Makes 5 half-pint jars
1 cup lemon balm leaves, chopped
1 cup lemon verbena leaves, chopped
3 cups boiling water
1/2 cup lemon juice
4 1/2 cups sugar
4 drops yellow food colouring (optional)
1 foil pouch liquid pectin
______________________
Quick Links for Mobile Users:
In Defense of Burning: Afire : Books Burnt : Fresh Coals : Hot Type : Warm Hands : Summer of Funner 2011 : About
